
 BLOG
BLOG
How to set up a permanent base station with Reach
Long-term projects call for long-term solutions. When you need consistent, reliable data over days, weeks, or even years, a permanent GNSS base station can make all the difference.
In this article, we’ll walk you through what a permanent base is, when to use it, how to set it up, and what makes Reach receivers especially suited for the job. Whether you’re surveying, mapping, or building complex infrastructure, having a fixed reference point will keep your results aligned and your workflow smooth.
Why use a permanent base station?
Let’s say you’re working on a road construction site, monitoring terrain over time, or running a large-scale survey project that spans several months. You need your GNSS rover’s data to align every day with no surprises.
That’s where a permanent base comes in. By keeping your base station fixed in one location, you create a stable reference point that all your rover positions relate to. If your base shifts even a few centimeters, it introduces the same error to every rover measurement. So, your stakeout from last month might not match today’s check-in.
A permanent base station solves that problem by offering:
- Consistent coordinates: Your data stays tied to the same base and antenna height. Stakeouts, as-builts, and monitoring results will align, even if you collect them months apart.
- Quicker starts, fewer errors: No need for reconfiguration each morning. You avoid mistakes from re-entering coordinates or slightly misplacing the base.
- Better signal environment: Once you find a good spot (clear sky view, minimal interference), you can lock in the best possible signal for the entire project.
And there’s one more benefit: peace of mind. Once your base is installed correctly, it quietly does its job in the background, sending precise corrections day after day.
Why Reach is ideal for permanent setups
Reach receivers are engineered to stay out in the field—come rain, snow, or sun. They’re not just weather-resistant, they’re practically weatherproof.
- IP68 rating: Reach RS4 is built to withstand dust, heavy rain, and even full submersion.
- Sealed ports: Keeps moisture and debris out.
- Magnesium alloy body: This material is used for aerospace equipment or high-end electronics and strikes the perfect balance of durability and lightness.
In short: Reach can handle tough environments without skipping a beat. Whether it’s bolted to a rooftop in Canada or mounted on a tripod in the desert, it’s made to last. Explore a great example from our community.
Four years of continuous operation in Canada
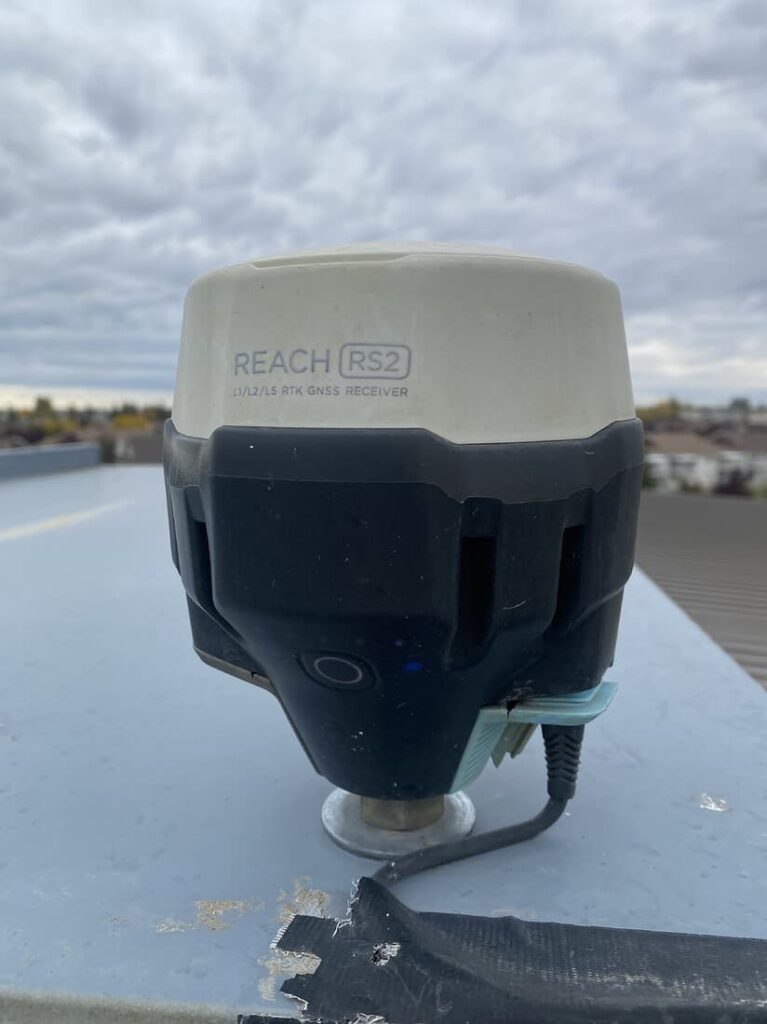
Grant Mills, a Canadian surveyor, installed the Reach RS2 (previous-gen Reach model) as a permanent base on a building rooftop. It’s been running continuously for years, through snowstorms, rain, and temperature swings. Despite the harsh conditions, the receiver still delivers centimeter-level accuracy to rovers in the field.
“I had a break where we didn’t need our NTRIP caster for a week or so. With that, I decided to remove the base station and just clean it up. As you can imagine, being outside continually for 4 years in Canada exposed it to a huge range of weather. So to say I was impressed would put it mildly. It’s been plugged in via USB and has a Wi-Fi access point right beside it. I’ve had zero issues with the base, and the caster has worked great the whole time.” – Grant Miles
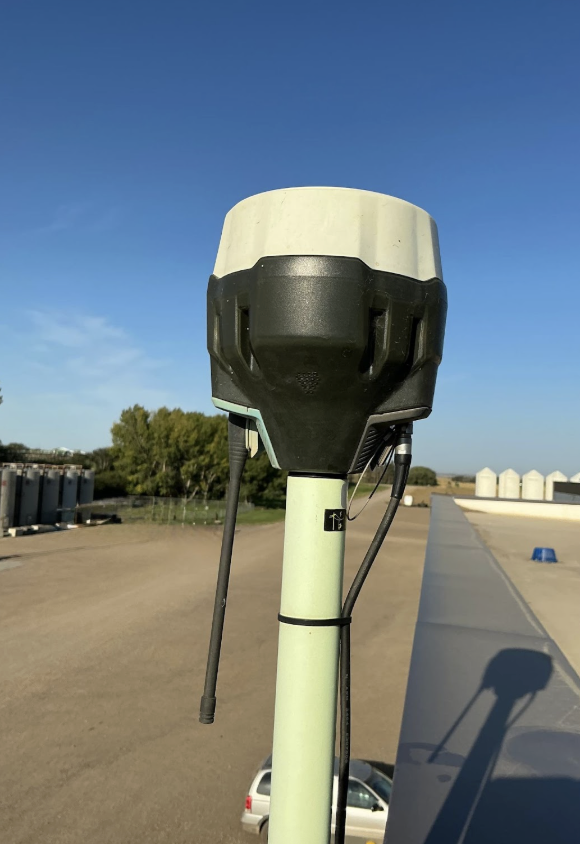
David Hofer, a digital farming expert from Central Alberta, Canada, has been running his Reach base station 24/7/365 since 2021. His farm operations rely on precise layout and elevation control for both construction and land grading, and Reach makes that easy.
“I can just start up any rover and get to work without worrying about a base setup,” says David. “It’s incredibly convenient when installing utilities, setting out building points, or leveling land with a motor scraper.” – David Hofer
Despite harsh conditions (-40°C winters and +35°C summers), David’s Reach system keeps running without interruption. This reliable setup saves him time and simplifies his workflow, allowing him to focus on the job, not the equipment.
Whether it’s for collecting points and lines during utility installations or maintaining the perfect slope in large-scale leveling projects, Reach offers the always-on accuracy David needs, no base reconfiguration, no downtime.
This kind of long-term deployment shows what Reach is capable of and what you can achieve with the right setup.
Step-by-step guide: how to set up your permanent base
Setting up a permanent GNSS base doesn’t have to be complicated. Follow these steps to get started.
1. Find the right location
The golden rule: your base should stay in place and stay online. Look for a spot that offers:
- A clear sky view in all directions
- Minimal electromagnetic interference (e.g., away from power lines, large metal structures)
- A stable, rigid surface like a rooftop or concrete pad
Tip: Higher is often better. Mounting the base on a rooftop improves signal quality and minimizes obstructions. For more details, check out our Base Placement guide.
2. Mount your base securely
This is not a tripod situation. You need something rock-solid. Bolt the base to a non-movable structure, and double-check that nothing will cause it to shift.
If you’re planning to leave it unattended for weeks or months, make sure:
- It can’t be accidentally bumped or moved
- It’s protected from curious passersby, animals, or wind gusts
3. Provide continuous power
Reach supports flexible power options, since a stable supply is key to long-term operation. You can power it via:
- USB-C port (for setups with nearby power outlets)
- Bottom connector (for permanent wiring using 5–40V input)
For remote sites or rooftops, we recommend using the 9-pin power connector. This lets you:
- Supply power from external sources (solar panels, batteries)
- Add a switched lead for remote on/off control
4. Set up RTK correction broadcasting
Your base isn’t just sitting there; it’s constantly sending RTK corrections to your rover. There are two main ways to do that:
Via Emlid NTRIP Caster:
Perfect if you have stable internet access at the base location.
- Use a SIM card and cellular modem
- Connect via Wi-Fi or Ethernet
- Send corrections over the internet to any number of rovers
Via LoRa or UHF radio:
Best for remote locations with no internet.
- Line-of-sight required
- Ideal for short baselines (under 10 km for best results)
You can also set up dual-output to send corrections over two channels, like LoRa and NTRIP simultaneously, for added reliability.
5. Determine and save the base position
This step ensures your rovers calculate positions correctly in your desired coordinate system.
- Open Emlid Flow
- Go to Base Settings
- Choose a method:
- Manual coordinates (known location)
- Survey-in (for quick local reference)
- Average FIX or PPP for high-accuracy results
Once done, save this setup. Don’t change it later unless absolutely necessary.
Things to watch out for
Even a great base setup can go wrong without attention to detail. Here are a few things to keep in mind:
- Baseline length matters. Stay within 60 km of your rover—but ideally under 10 km for highest accuracy.
- Watch your power supply. Use surge protection or backup batteries where possible.
Log your setup. Note the antenna height, exact coordinates, and any changes over time. This helps if you need to troubleshoot later.
Ready to set up your own permanent base?
Setting up a permanent base is one of those “set it and forget it” upgrades that can noticeably improve your survey results. Whether you’re working on a large infrastructure site or monitoring a field over time, a stable base helps you stay focused on what matters—collecting precise, repeatable data.
If you’re looking for the right receiver for a permanent base, take a closer look at the Reach RS4. With a durable design, flexible connectivity options, and a straightforward setup, it’s built to deliver reliable corrections for as long as you need.